For the Newbies
If you’re new to the subject of home brewing let me give you the nickel tour so the rest of this article will make a bit more sense. Even if home brewing is old hat to you, a review never hurt anyone.
Home brewing (or sometimes called homebrew) is the term used for creating beer, wine and other drinkable alcohol at home on a non-commercial basis. Notice i said non-commercial. I didn’t say non-professional. You gotta pay attention to what you’re doing or you may end up with some funky brews.
All drinkable alcohol is created by little microbes called Yeast. Yeast eat sugar and output 2 products of note, drinkable alcohol (ethanol) and carbon dioxide gas. The Co2 is important in some forms of brewing, but isn’t really relevant in this discussion. The act of yeast converting sugars (usually suspended in a liquid like grape juice) into alcohol and Co2 is called fermentation.
Other relevant information includes the fact that yeast multiply at an astonishing rate. Adding a few thousand yeast cells to a batch of wine can force a bloom of yeast cells in the billions in a day or two. The more yeast present the more sugars are getting converted. You should also realize that the method by which yeast reproduce is mitosis, aka, the cells literally split in 1/2 and continue growing to produce 2 cells from the 1.
Timelines
Most of the alcohol in any fermentation is created in the first 15 to 30 days. A good 80-90% of the alcohol in fact. After that point the alcohol levels are starting to get so high that it begins to inhibit the yeast’s ability to convert sugars. It’s a slow up hill fight from there for the yeast to continue fermentation. Alcohol is poison to yeasts. Thats’ why they dump it out of their cells in the first place. The more of it present in a solution the slower the yeast work. Eventually as the alcohol level continues to rise the yeast start to die off. This slow process of the yeast dying as the alcohol level rises can take anywhere from another 30 days to up to an additional 2 years!
Why stop a fermentation?
There are many reasons, but by far the most common is you want to be able to drink your batch of home made wine/beer without waiting all that extra time. After all, a 80-90% of your alcohol is made in the first 15 to 30 days. Unless you’re trying to make some especially exquisite wine or aged beer or you want that extra 10-20% alcohol because you’re making home-made rocket fuel then what’s the point of waiting right?
So, lets say your cousin’s best friend’s next door neighbor’s aunt Gertrude is getting married. She’s had your home made wine because your cousin just couldn’t keep his yapper shut about the bottle you gave him for christmas last year. (that’s the last time you give him free alcohol for xmas!) So Gertrude wants to cheap out on her open bar at the reception and have you make 6-7 gallons of the good stuff. No problem. Let her buy the supplies and give them to you. Wait… the wedding is in 2 months you say? Well, crap. What to do?
You could just start the batch asap and give her the wine in 2 months with an active yeast culture in it, but as Alton Brown would say, that’s not good eats. Having an active yeast culture in a brew might be OK for some beers, but it’s bad news for delicate flavors like wines. You definitely need to stop the fermentation and remove the yeasties. How do you stop a fermentation early? How do you kill all those nasty yeast buggers after they’ve slaved to make your ethanol?
Yeast and Ice Crystals
Here’s where things get all scientific like. You may have noticed that when you freeze fruit and then thaw it the fruit loses some of it’s firmness and lets out a LOT more juice. This is because the process of freezing, especially slow freezing creates large ice crystals. Ice is made of water. Yeast have lots of water in them. What happens if you turn the water in the yeast into an ice crystal? Crystals can be sharp. I bet they’ll tear those yeast beasties to pieces. Oh, the HORROR!
So, if you freeze your home brew it’ll kill all the yeast? No… It will kill MOST of them, but yeast, especially wine yeasts, are vigilant little monsters. A few will survive the freezing process and as we learned above if you have just a few cells they’ll likely bloom again when the temperature rises and create more yeast and the next thing you know you have a full blown fermentation going again.
Potassium Sorbate
What you need is a one-two punch. You need something that will keep the yeast that survive from multiplying again. That’s where Potassium Sorbate comes in. This stuff is routinely used by home brewers right before bottling. It coats the yeast cells in a kind of varnish that keeps them from splitting so they can’t reproduce. If they can’t reproduce the fermentation cannot get any more intense. It’s very important to note that potassium sorbate does NOT kill yeast. It only keeps them from multiplying.
Why not just add wine sanitizer?
You could add a chemical agent such as campden tablets or wine sanitizer (usually sodium metabisulfite or something similar) to kill the yeast, but you would need a LOT of tablets and that would not taste good and the sanitizer doesn’t taste good either. It should be noted that campden tablets are nothing more than tablets with a few grains of sanitizer in the middle. Throwing in a hand full of those is the same as adding sanitizer. Sanitizer tastes BAD. If you dont believe me mix some up and take a swig right now. You’ll spit it right out. I’ll wait. You can continue reading when you finish gagging. Most sanitizers are sulfites anyway and some folks are sensitive to sulfites so I try to keep them out of my wines as much as I can. You still need sanitizer to clean your brewing equipment, but I do try to keep it out of the wine itself when possible.
The method (to the madness)
I’ve experimented with this method over the years and I’ve found that if you mix potassium sorbate into a batch you’re ready to “kill” and then siphon the wine into small jugs like 2 liter soda bottles or even gallon jugs you can then freeze them solid in a deep freeze. I got my deep freeze for like $150 at my local Sam’s Club. Of course now my wife is using it to store a dozen frozen lasagnas, mixed veggies and a dozen loaves of bread she bought on the cheep at the bread store so I can’t use it for home brewing…. but i digress. Buy your wife her own freezer and tell her to leave yours alone.
You may be tempted to try and freeze whole 5 gallon batches in the same container. I can tell you from personal experience it doesn’t work as well. It takes much longer to freeze a higher volume of liquid, much longer to thaw and by the time its all thawed again you might as well have just waited the 2 years for the yeast to die anyway. Freezing in smaller containers works MUCH better. Remember that most of your brew is water and water expands when it freezes so leave some room in the bottle for this. I learned this lesson the hard way when I opened my chest freezer at the house and the bottom of it was covered in a sheet of frozen wine. It wasn’t fun chipping that stuff off the bottom of the freezer. It was tasty, but not fun.
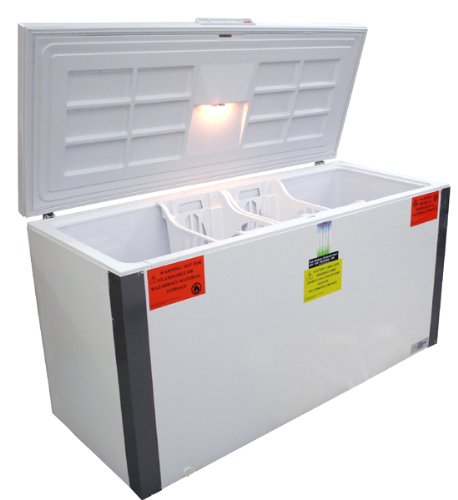
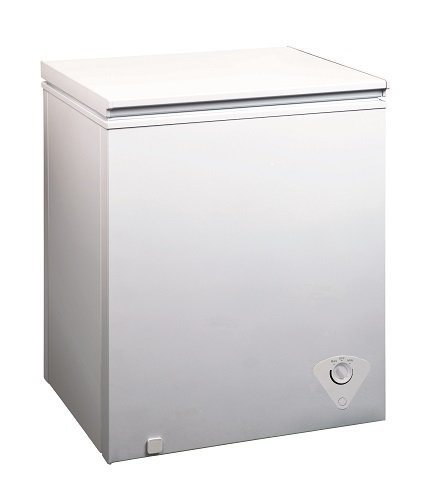
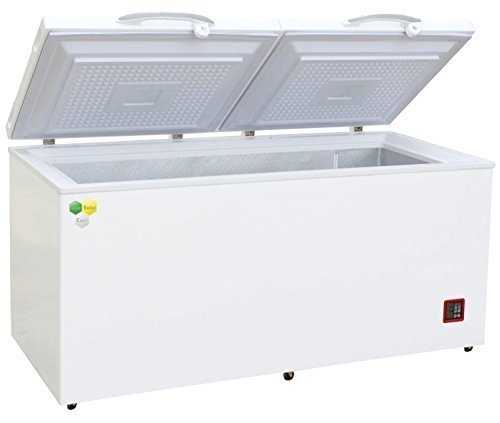
In my experience, if you use 2 liter bottles to freeze and you have a good 5-10 cubic foot chest freezer you can drop the bottles in, wait two days to freeze, pull them out, wait 1-2 days to thaw (at room temp.) and then re-freeze and thaw one more time. The whole process takes about a week. After that point 95-99% of the yeast are dead and sitting in a heap of sludge at the bottom of your bottles.
Is it perfect?
The freezing method above isn’t 100% reliable. I would say it’s closer to 80% reliable honestly. Your stuff can still re-ferment in the bottle, but the chances of that are MUCH lower than if you hadn’t froze the batch. The freezing also killed most of the yeast cells and piled them up at the bottom of your bottles so you can siphon off the much clearer and crisper tasting wine and leave the gunk in the bottom of the bottles.
Bottle in Plastic
My final suggestion is to bottle in plastic, not glass. Glass is elegant and great for gifts, but in all honesty you really don’t know if your batch is going to start to re-ferment in the bottle. Glass isn’t really designed to take a lot of pressure (well, champagne bottles are, but unless you have a LOT of those laying around…). Plastic IS designed to take the pressure, especially if it’s a bottle that had a carbonated drink in it like 2 liter soda bottles. Lets be honest anyway, If you’re going to pop open a bottle of the good stuff with a few buddies you’re probably going to suck down a 2 liter between everyone anyway. Anyone who’s been home brewing for any amount of time knows that as soon as you pop open a new bottle of something you have someone knocking at the door, “just to say hi”. 
If you really don’t think you can finish off a 2 liter in say 2-3 days then you want something that’s more single-serving sized. After 2-3 days in the fridge a 1/2 full bottle of wine will start to taste funky because of oxidation. You could get one of those neat and expensive argon gas gadgets out on the market to replace the air in the bottle with argon, but that’s kind of a waste of money imo. I would just use single serving plastic coke bottles (like the 16-20 oz sizes) or maybe even invest in one of those little “wine saver” pumps that users a rubber stopper and a manual pump to suck all the air out of a bottle. Those really do work pretty well.
Besides, if you bottle in plastic you can always squeeze test your bottles periodically. (It’s kind of hard to squeeze test glass) If they’re getting hard they’re probably fermenting again and you want to use them soon or at least crack the top open periodically and vent the gas. Nobody wants a 2 liter of wine to explode in their closet. Worse case scenario, you have fizzy “sparkling wine” because the fermentation in the bottle carbonated the wine. I’ve accidentally made that a time or two and it was quite nice. 
Check out our favorite Best Chest Freezers 2016
Summit VT225 21.5 Cu. Ft. White Chest FreezerCheck PriceEquator Chest Freezer, 5 Cubic Feet, WhiteCheck PriceAvanti 7.0 Cu. Ft. Chest Freezer WhiteCheck PriceEcoSolarCool Solar Refrigerator/ Freezer 14 Cu FtCheck PriceSunStar 14 Cu.Ft. Solar-Powered Chest FreezerCheck Price


0 comments:
Post a Comment